 Appwrite Workshop
User Management 🧭

Welcome to the top of the island, at the Traveler's Inn! Here, you'll get a comprehensive overview of all the adventurers in our island journey. With the power of Appwrite's server-side SDK, you can interact with all users, view their information, and manage their accounts in one place. Explore this admin island to discover user management features! 🧭
⚠️ Initial Configuration
Ensure that your application is correctly configured to interact with Appwrite's server-side SDK before you start managing users. If you've followed the configuration steps in the Configuration section, you're ready to proceed 📝.
Account vs Users
The Account API is the one you should use in your client applications with Client SDKs like web, Flutter, mobile, and native applications. The Account API creates sessions, which represent an authenticated user and are attached to his account. Sessions respect permissions, meaning users can only access resources if they have the appropriate permissions.
The Users API is dedicated to user management from an administrator's perspective. It should be used with backend or server-side applications equipped with server SDKs. The Users API uses API keys instead of sessions. This means they are not limited by permissions but by the application fields granted to the API key in use.
Overview of Travelers 📊
In this section, we'll explore how to use Appwrite's server-side SDK to retrieve information about travelers. You'll be able to see the complete list of travelers, view their profiles, and learn more about them! 🤜🏼 🤛🏼
To get started, we need to initialize our SDK for the Users service. Just like for the Account service, we'll import the Users service and create a new instance, passing your Appwrite client as a parameter, but also a valid API key!
Step 1️⃣: Create an API Key
API keys are secrets used by the Appwrite server SDKs and the Appwrite CLI to prove their identity.
⚠️ Best Practice
It's a good practice to grant an API key only the application fields needed for a specific action. They should be treated as a secret. Never share them and keep them out of client applications.
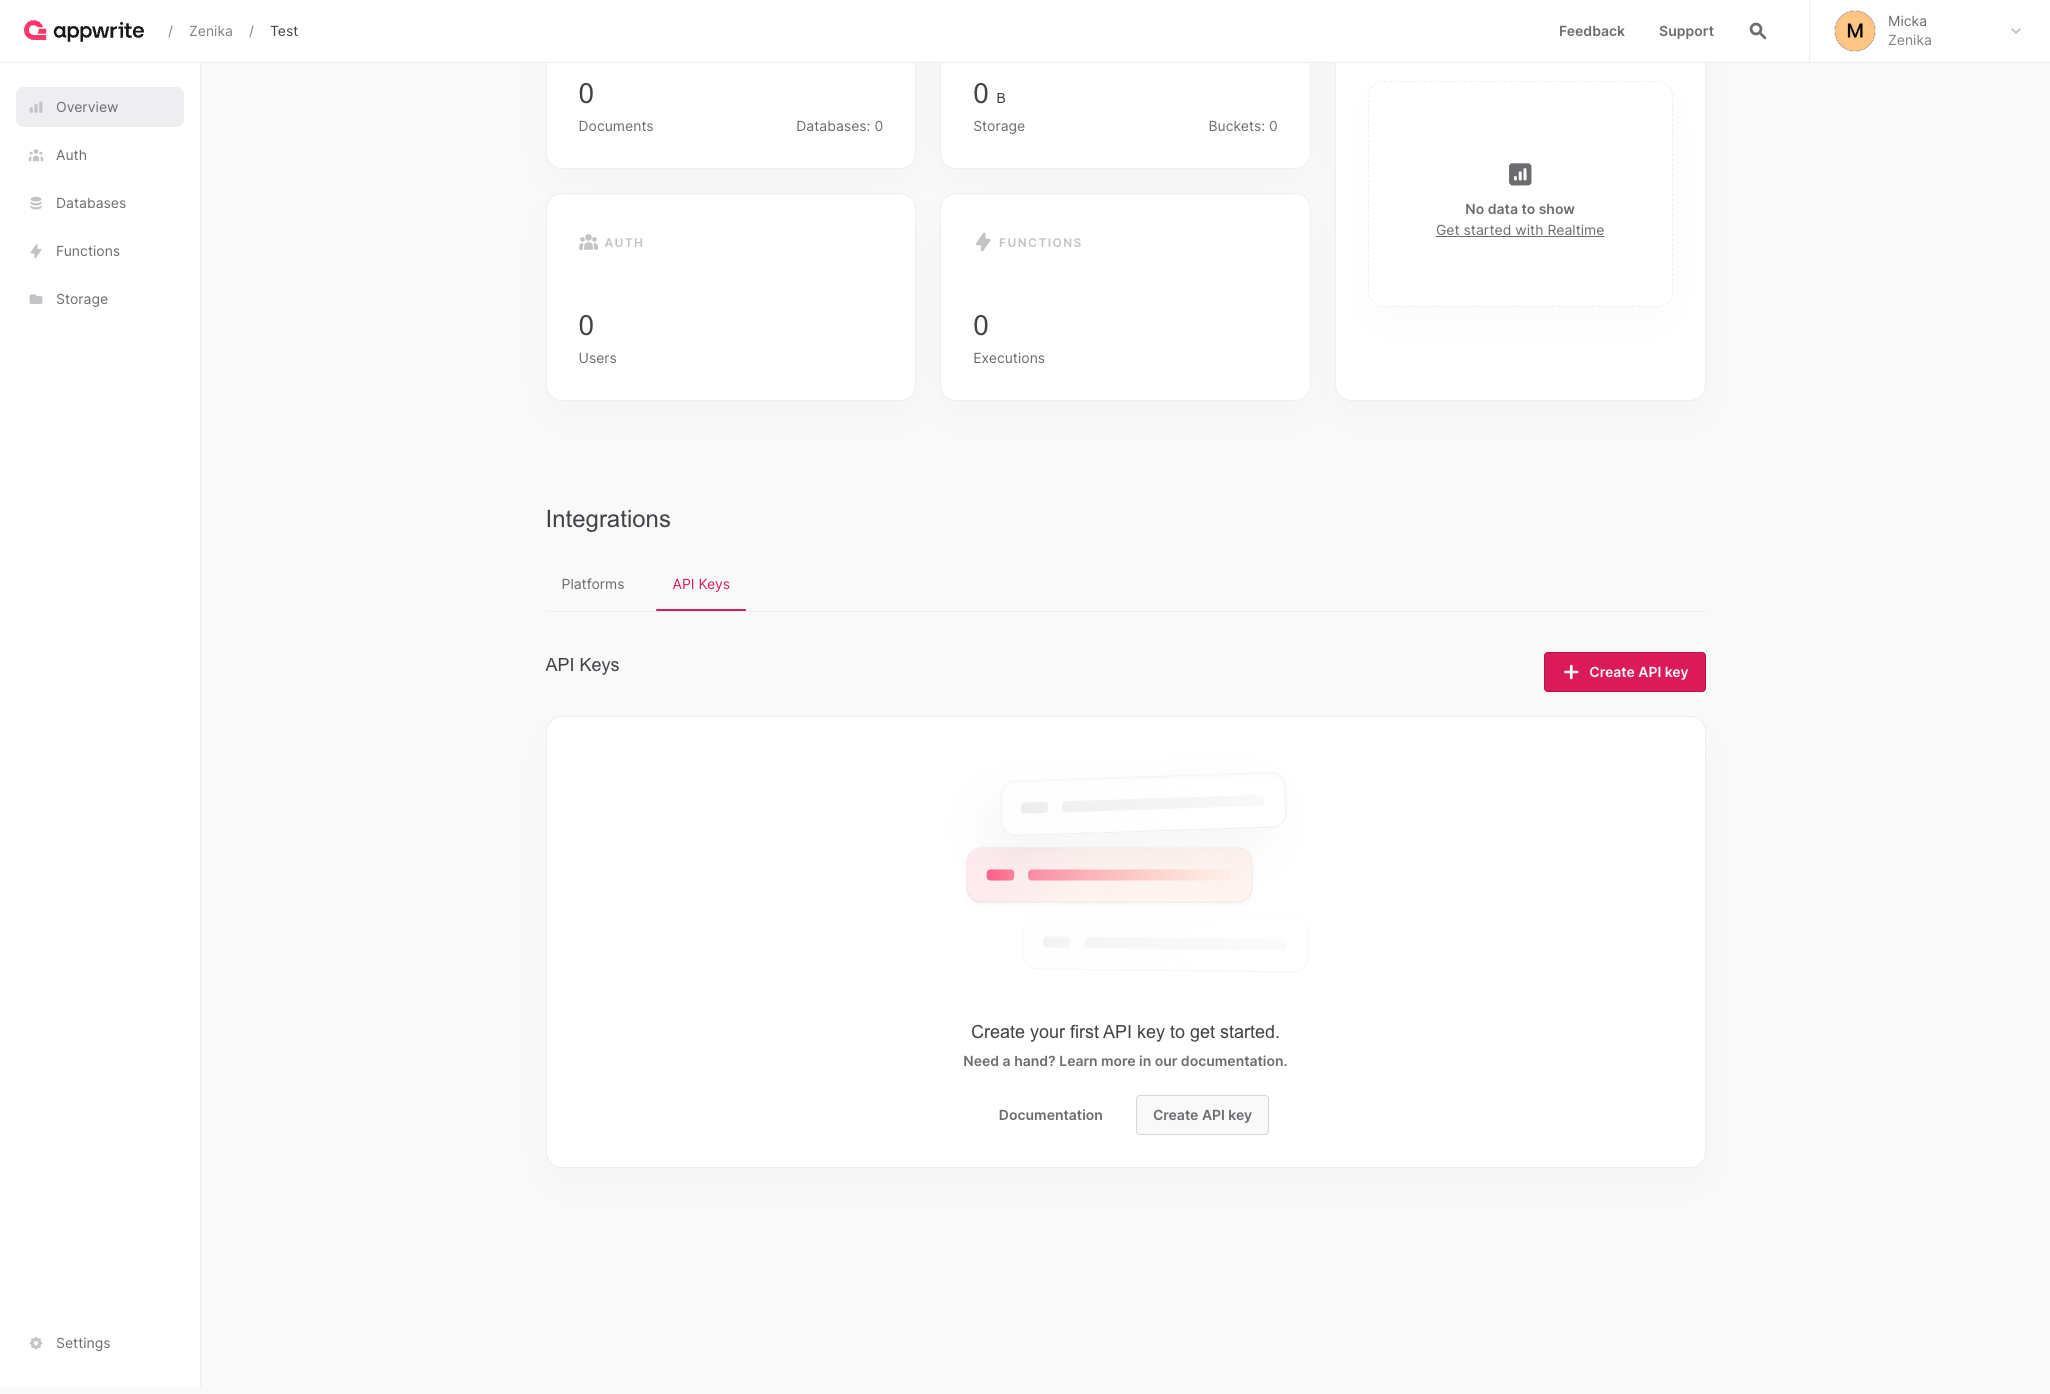
Go to the Appwrite console, in the Overview section. In the Integrations part, click on the API Keys tab. Then click the Create Key button. Give your API key a name, specify an expiration date if you wish, and select the application fields you want to grant to this API key. Next, enter it in the APPWRITE_API_KEY_USERS variable in your .env.local file.
WARNING
Do not grant your API key access to all application fields. This could compromise your application's security.
DANGER
You have just modified an environment variable, remember to restart your server to apply these changes.
Step 2️⃣: Initialize the Server-Side SDK
To initialize a server-side SDK, we'll create a file src/workshop/api/config/server.config.ts. This time, we'll import the Appwrite Client not from the client-side SDK but from the server-side SDK. In our case, we'll use the Node.js SDK.
Solution ✅
import { Client } from 'node-appwrite';
import { EnvConfig } from './env.config';

export const AppwriteClient = new Client()
  .setEndpoint(EnvConfig.endpoint ?? '')
  .setProject(EnvConfig.projectId ?? '')
  .setKey(EnvConfig.apiKeyUsers ?? '');
import { Client } from 'node-appwrite';
import { EnvConfig } from './env.config';
export const AppwriteClient = new Client()
.setEndpoint(EnvConfig.endpoint ?? '')
.setProject(EnvConfig.projectId ?? '')
.setKey(EnvConfig.apiKeyUsers ?? '');WARNING
Please note that even though we initialize our instance with new Client(), it doesn't mean it's a client-side SDK. The distinction between a client-side and server-side SDK depends on where the SDK is imported and used. In this example, we're importing it from a Node.js runtime on the server side, using node-appwrite rather than appwrite!
💟 Info Bonus : 8 Other Server-Side SDKs!
If you decide to use another server-side language later on, you can do so without any issues. Appwrite offers 9 different server-side SDKs for the following languages: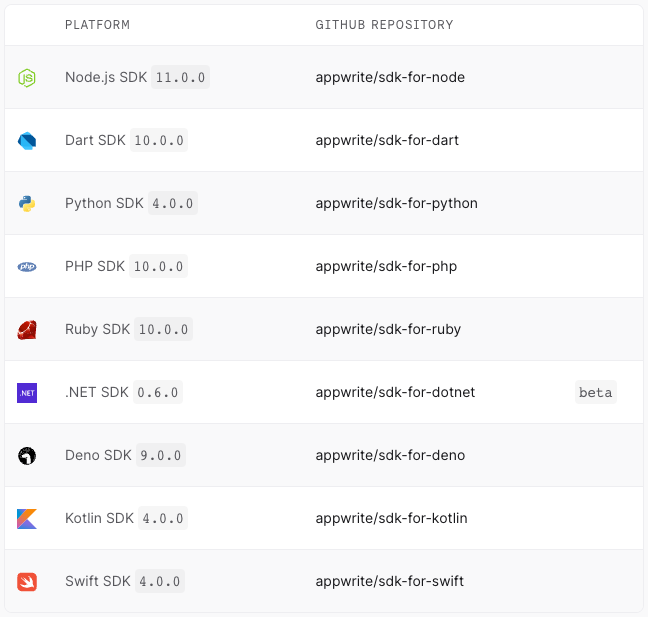
Step 3️⃣: Retrieve Travelers
Use the SDK to retrieve the complete list of users registered in your application. To display the list of users, we already have a page ready to use, which is the /users page of our application. It seems like a piece of code is missing to display the list of users, right? 🤔
To begin with, you need to initialise the Users service in the src/workshop/api/config/server.config.ts file, as you do every time you use a new service.
Solution ✅
import { Users } from 'node-appwrite';

export const AppwriteClient = new Client()
  .setEndpoint(EnvConfig.endpoint ?? '')
  .setProject(EnvConfig.projectId ?? '')
  .setKey(EnvConfig.apiKeyUsers ?? '');

export const users = new Users(AppwriteClient);
import { Users } from 'node-appwrite';
export const AppwriteClient = new Client()
.setEndpoint(EnvConfig.endpoint ?? '')
.setProject(EnvConfig.projectId ?? '')
.setKey(EnvConfig.apiKeyUsers ?? '');
export const users = new Users(AppwriteClient); In the src/workshop/api/modules/users/travelers.ts file, we can complete the getTravelersList function to retrieve the list of users.
Solution ✅
import { users } from '@/workshop/api/config/server.config';
import { Users } from '@/models/users';

export const getTravelersList = async (): Promise<Users> => {
  try {
    const { users: usersList } = await users.list<Users>();

    return usersList;
  } catch (error: any) {
    throw new AppwriteException(error);
  }
};
import { users } from '@/workshop/api/config/server.config';
import { Users } from '@/models/users';
export const getTravelersList = async (): Promise<Users> => {
try {
const { users: usersList } = await users.list<Users>();
return usersList;
} catch (error: any) {
throw new AppwriteException(error);
}
};TIP
Here, we are using just one method to interact with the Users API, but you can imagine that there are plenty more! You can find the complete list of available methods in the API documentation. This will enable you to search, block, and display information related to your users, current sessions, and recent activity logs. You can also use the Users service to modify user preferences and personal information.
If you have followed the previous steps correctly, you should now see the list of users displayed on the /users page of your application, with plenty of information about the wonderful individuals who are closely or remotely involved in this adventure! 🎉
Speaking of adventure, it's time to move on to the next part. There's still plenty more to discover, so head to your next destination! 🏝