Appwrite Workshop
Linking AppVenture to your Appwrite instance 🌐

Congratulations, you've prepared your AppVenture, and now it's time to link it to your Appwrite Cloud instance! Without this, the AppVenture won't be able to interact with your Appwrite instance, and you won't be able to continue your journey 🚢
INFO
This process could have also been done in previous steps during the creation of your Appwrite instance and your project in the Appwrite Cloud console 🏞️
Prepare Your AppVenture: Linking to Appwrite 🧵
For now, when you access your AppVenture, you'll see a page telling you that your application is not yet linked to your Appwrite instance. This is normal, and we'll fix that now! To do this, the application needs a few environment variables:
1. Create a .env.local file at the project's root and configure the necessary environment variables using the information you obtained when creating your Appwrite Cloud instance. Copy the contents of .env.example into .env.local.
2. Here are the first environment variables you need to configure:
NEXT_PUBLIC_APPWRITE_ENDPOINT: Replace the value with the URL of your Appwrite instance. You can find it in the Appwrite console by accessing the 'Settings' page in the left navigation bar or at the /settings route..NEXT_PUBLIC_APPWRITE_PROJECT_ID: This ID is unique for each Appwrite project. You can also find it in theSettingspage.
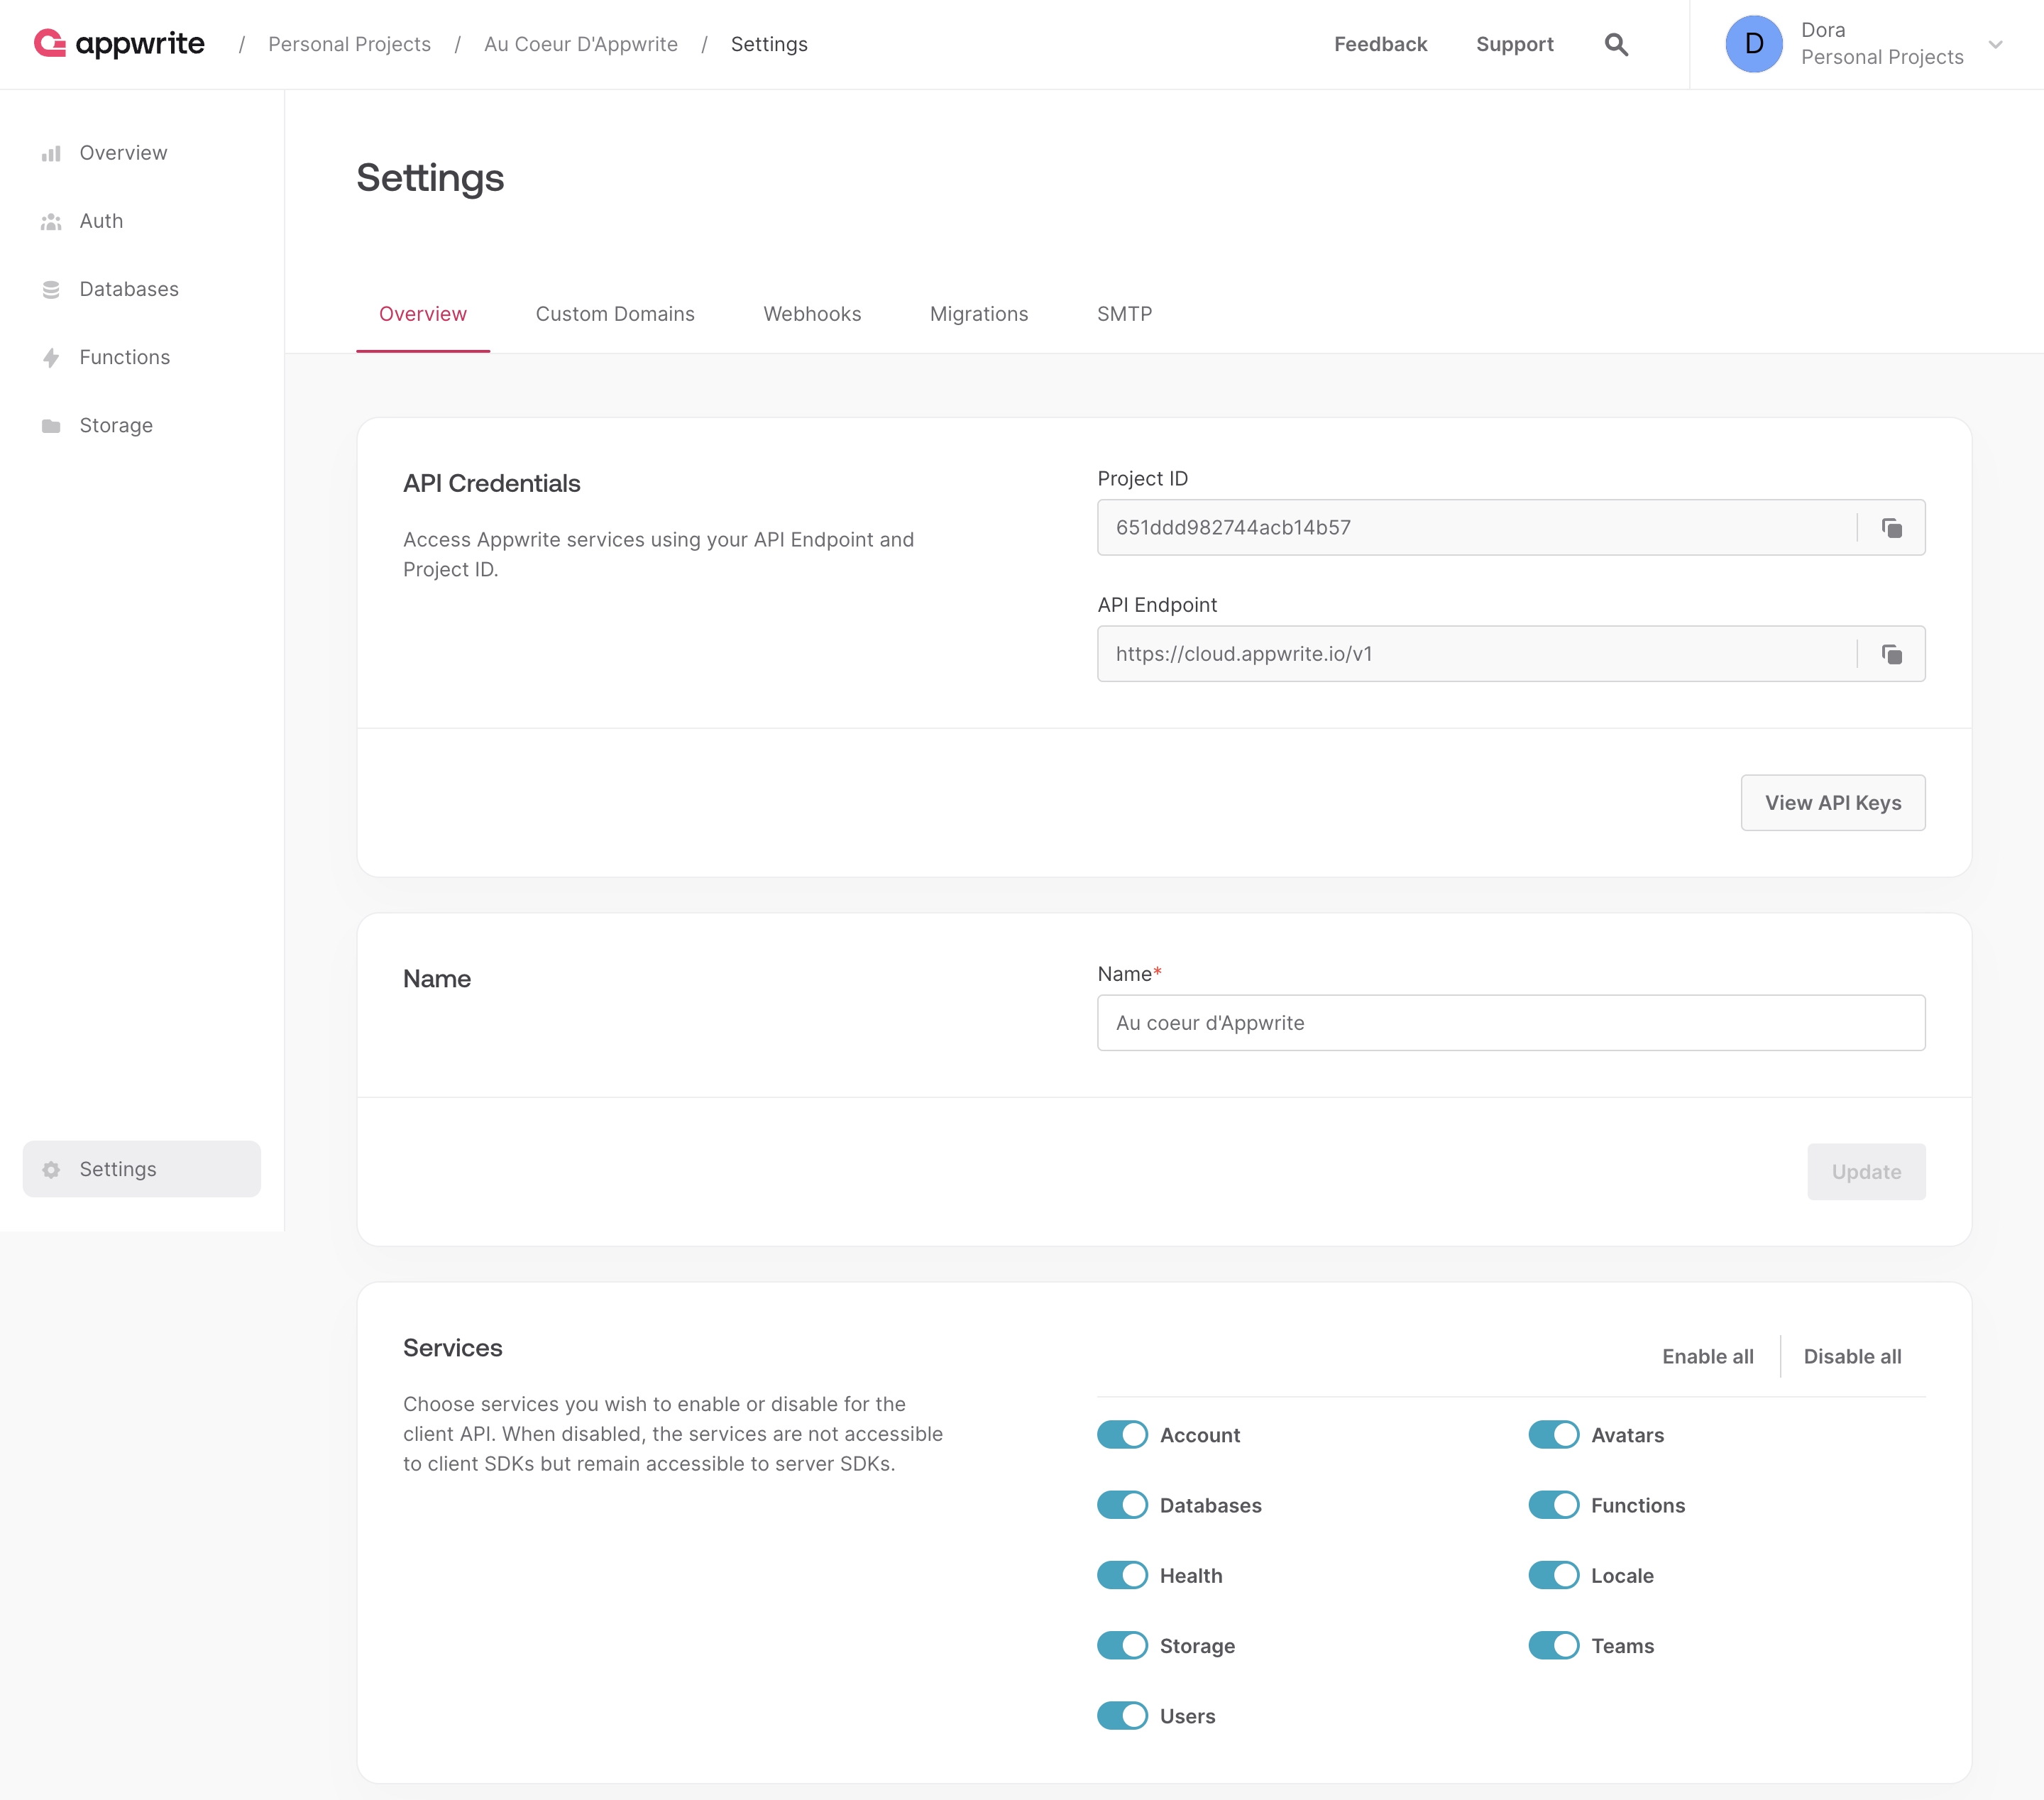
TIP
In the Settings section of the Appwrite Cloud console, you'll find the project ID, along with other configuration information for your project, such as:
- Enabling Appwrite services (Auth, Database, Storage, Functions)
- Configuring custom domains, webhooks, SMTP server, etc.
- Interfaces for migrating data from a self-hosted Appwrite instance to an Appwrite Cloud instance or importing data from Firebase, Supabase, or Nhost into your Appwrite instance 🤩
For more information, you can check out the Appwrite documentation on data migration 📘
3. Save the .env.local file after making these modifications.
4. Update the file client.config.ts file in the src/workshop/api/config/ folder and add the code to initialize the client-side Appwrite SDK. It is the initialisation of the SDK with the environment variables that will enable the application to communicate with your Appwrite instance via the various Appwrite services that we will initialize later.
INFO
You can use EnvConfig to access variables in the .env.local file.
Solution ✅
import {Client} from 'appwrite';
import {EnvConfig} from './env.config';

export const AppwriteClient = new Client()
  .setEndpoint(EnvConfig.endpoint ?? '')
  .setProject(EnvConfig.projectId ?? '');
import {Client} from 'appwrite';
import {EnvConfig} from './env.config';
export const AppwriteClient = new Client()
.setEndpoint(EnvConfig.endpoint ?? '')
.setProject(EnvConfig.projectId ?? '');This code will initialise the Appwrite SDK that we will use in our application. It will then allow us to initialise the various Appwrite services in our application.
5. That's it! Your AppVenture is now ready to interact with your Appwrite instance ! 🎊
💟 Info Bonus : Warning: We Have IDs in Plain Sight in Client-Side Code!! 😱
Note that some of our variables are prefixed with NEXT_PUBLIC_ to make them accessible on the client side 😱
In the case of applications built with tools like Firebase and Appwrite, it's common to store IDs in plain sight in client-side code. This may seem counterintuitive from a security perspective, but there's a reason for it. These keys are used by client-side SDKs to interact with services (Appwrite, Firebase, etc.) and authorize certain operations.
However, services like Firebase and Appwrite offer robust security mechanisms to ensure that only authenticated and authorized applications can perform certain actions. This means that even if the keys are exposed, they are not sufficient to access data or perform operations without the proper permissions, as authentication and authorization mechanisms and rights can be configured 📝
This includes declaring authorized platforms to access your instance by specifying allowed domains:
(Yes, we put localhost at that moment, not the best security practice... You'll remember to change that later 😅)
In Search of Traces from Ancient Explorers 🕵️♂️
Before we embark on this exciting journey, it's time to take a look at the hidden treasures that ancient explorers left behind. They left behind clues and elements that will facilitate our progress. We'll retrieve this information and integrate it into our own journey.
Running the Script of Ancient Explorers 📜
To begin, we'll run a special script that will accomplish two things:
1. It will check that your AppVenture is correctly linked to your Appwrite instance 💪🏼
2. It will initialize your project with initial elements left by ancient explorers. These elements will give us a good starting point for exploring the world of Appwrite. (And they are essential for the workshop to function correctly 😅)
WARNING
Before running the script, make sure you've followed the previous configuration steps to link your AppVenture to Appwrite. Once that's done, launch the script and let it do its work.
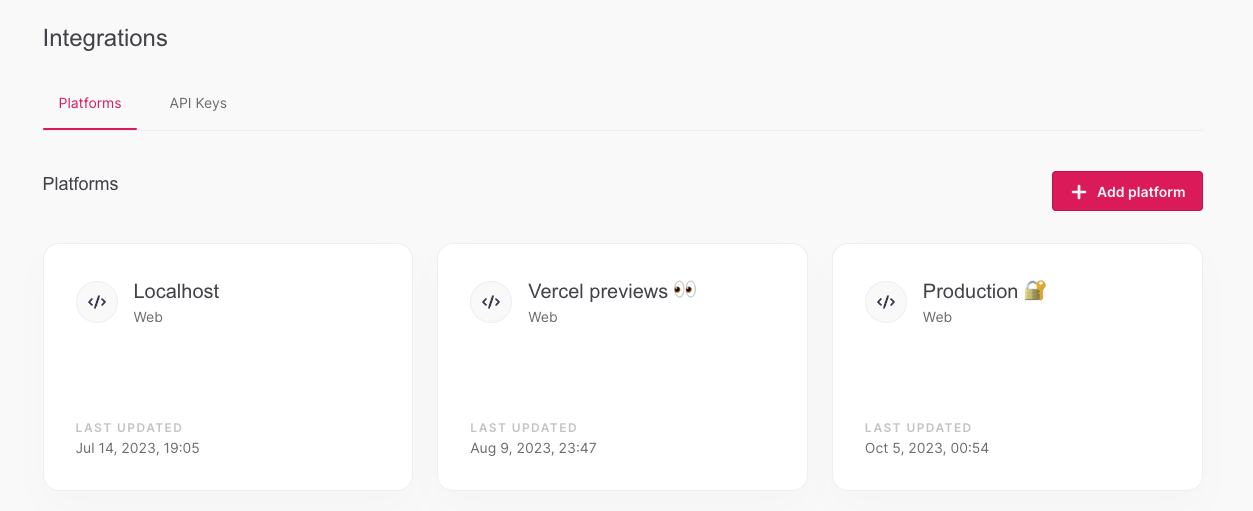
3. To allow the script to access the Appwrite instance, it will need an API key, which is a secret used by the server-side Appwrite SDKs, and the script requires it.
To do this, go to the Overview section of the Appwrite console, then navigate to Integrations, and finally click on the API Keys tab. All that's left is to create a key by clicking the Create Key button, giving it a name, and selecting all the services.
Once the key is created, you can add it to your .env.local file in the APPWRITE_API_KEY_SCRIPT variable.
DANGER
You have just modified an environment variable, remember to restart your server to apply these changes.
WARNING
For the initialization script, we need access to all services, but in a real scenario, it's advisable not to assign all permissions to a single key. In the later part of the workshop, you will need to create other keys that don't have access to all services.
🧑🏼💻 To use this script, you can run the following command from a terminal:
Load data into your instance:
node ./script/init-travel.jsnode ./script/init-travel.jsReset data in your instance:
node ./script/reset-travel.jsnode ./script/reset-travel.jsNow, it's as if we're consulting the old treasure map of the explorers to find hidden locations! Once the script is finished, we'll be ready to explore the next destinations of our adventure!
In the distance, behind our boat, we can see a mysterious island... it seems to be the second destination of our journey! 🏝️